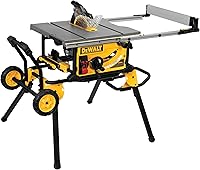
How to Maintain a Table Saw
To maintain a table saw, unplug it, clean dust from the table and cabinet, inspect the blade and guards, check alignment, and protect the metal surfaces. A short inspection before each session and a deeper tune-up at regular intervals keep cuts predictable.
On this page (11 sections)
- What should you do before maintaining a table saw?
- How often should you clean a table saw?
- How do you clean the table and miter slots?
- How do you inspect the blade and throat plate?
- How do you check table saw alignment?
- How can you measure blade run-out and fence position?
- How do you maintain the fence and adjustment controls?
- How do you protect the saw during everyday cutting?
- How do you maintain dust collection and outfeed support?
- What should you inspect before storing a table saw?
- What is the simplest table saw maintenance schedule?
To maintain a table saw, unplug it, remove sawdust, inspect the safety parts, check alignment, and protect the table from rust. Clean the saw after each session, then perform a deeper inspection whenever adjustments become stiff, cuts drift, or dust builds around the motor and cabinet.
A table saw stays easier to use when maintenance follows the same order. Start with power disconnected, clear the work surface, inspect the cut-control parts, and test adjustments without stock in the blade.
What should you do before maintaining a table saw?
Disconnect the saw from power before cleaning, adjusting, or inspecting parts near the blade. Remove stock, scraps, and tools from the table so you can see the blade insert, miter slots, fence path, and adjustment controls.
Use a brush or vacuum to remove dust without forcing debris into vents or bearings. Keep the cord and switch area dry, and wait until the blade has stopped before reaching near the arbor.
Maintenance is also a useful time to review how to buy a table saw if your current machine has become difficult to align or support. Maintenance improves an existing saw, but it cannot change its basic table size or adjustment design.
How often should you clean a table saw?
Remove visible sawdust after every work session and clean enclosed areas when dust begins to collect. Fine dust can settle around the motor, height mechanism, tilt mechanism, belt area, and dust port.
Brush the table, fence face, miter slots, and throat plate first. Vacuum the cabinet and floor without pulling on wires or striking the blade.
Clear the dust-port connection so the hose remains open.
Wipe resin or pitch from the blade only with a cleaner suited to the blade material. Dry the blade before reinstalling it, and keep fluid away from the table and electrical parts.
A rough height wheel, stiff tilt lock, or dusty cabinet signals that the saw needs attention.
How do you clean the table and miter slots?
Clean the table until it is smooth, dry, and free of packed dust. A clean surface lets stock slide evenly and makes rust, scratches, or a raised fence easier to notice.
Use a soft brush or vacuum around the throat plate and miter slots. Wipe the cast-iron table with a dry cloth, then remove sticky residue with a suitable cleaner that does not leave a heavy film.
Clear miter slots with a narrow brush or safe nonmetal tool. Do not scrape aggressively across the slot edges, because a burr can affect a miter gauge or alignment tool.
After drying, apply a thin protective coat intended for table saw surfaces if the table is cast iron. Buff it well so the finish does not transfer to boards.
How do you inspect the blade and throat plate?
Inspect the blade for pitch, damaged teeth, wobble, and secure mounting before cutting. Remove it for a closer inspection when the teeth or plate are hard to see.
Check that the blade is seated correctly on the arbor and that the nut is secure. Keep the teeth facing the correct direction for the saw's rotation.
Replace a blade with damaged teeth.
Look at the throat plate for cracks, movement, or a raised edge. It should sit firmly and level with the table.
Clear dust beneath it before reinstalling it.
Inspect the riving knife, blade guard, and anti-kickback parts for damage or binding. Never operate with a safety part that is loose or obstructs the cut.
How do you check table saw alignment?
Check the blade's relationship to the miter slot first, then set the fence parallel to that reference. Alignment is easier when the blade is clean, the throat plate is seated, and the saw is unplugged.
Rotate the blade by hand and compare the same tooth at the front and rear of the table. Use the saw's approved adjustment points to correct the blade or trunnion position, then repeat the measurement.
Next, compare the fence to the miter slot. The fence should remain parallel or have the small clearance recommended for your saw's design.
A fence pointing inward toward the blade can increase binding.
Our guide to how to align a table saw covers the reference points in more detail. Make small adjustments, tighten one fastener at a time, and recheck after tightening.
Which alignment tool helps with routine checks?
The A-Line-It Basic Alignment Tool suits a hobby shop that wants one tool for blade run-out and fence measurements.
The tool includes a 1 in capacity dial indicator that reads in .001 in increments. Its miter groove bar measures 3/8 in x 3/4 in x 6-1/4 in, while the mounting bar measures 3/4 in x 3/4 in x 5-1/2 in.
It also supports depth-of-cut checks on a jointer and alignment work on a planer.
How can you measure blade run-out and fence position?
Use a dial indicator to compare repeatable points instead of judging alignment by eye. Place the indicator in the miter slot, bring its tip against the blade or another reference surface, and rotate the blade slowly while watching the reading.
Mark a blade tooth or use the same tooth for front and rear measurements. Keep indicator contact consistent.
A changing reading shows that the blade or arbor needs closer inspection before you adjust the fence.
For fence checks, position the indicator against the fence face and move the gauge through the slot. Record the front and rear readings, then adjust the fence until the relationship is consistent.
When is a digital gauge useful?
The Neoteck Digital Table Saw Alignment Gauge fits readers who want a digital reading and a gauge for other shop machines.
Its measurement range is 0 to 1 in, with a stated resolution of 0.0005 in (0.01 mm). The display switches between millimeters and inches and includes zero setting.
The set has 2 adjustable anodized aluminum bars and a self-adjusting Smart Bar design. The bars fit a groove width of 3/4 in (19 mm) or more, and the package includes a storage case, digital indicator, hardware, and wrenches.
Use the gauge for a measured adjustment, not as a reason to move every setting. If the blade and fence track correctly, record the readings and return to normal cleaning.
How do you maintain the fence and adjustment controls?
Keep the fence face clean, the locking action firm, and the height and tilt controls free of packed dust. A fence that slides unevenly makes setup slower and can shift after locking.
Brush dust from the fence rails and guide surfaces. Wipe resin from the fence face so boards do not catch.
Inspect the locking handle and rail for looseness, then tighten only the intended fasteners.
Turn the height and bevel wheels through their normal range while the saw is unplugged. If movement feels rough, locate dust or residue before applying a small amount of suitable lubricant.
Keep lubricant away from the belt, blade, table, and wood-contact surfaces. Excess oil attracts dust.
How do you protect the saw during everyday cutting?
Use steady support, controlled feeding, and a clean path around the blade. Poor support can push stock into the blade or force the fence out of position.
A featherboard helps hold stock against the fence or table during appropriate cuts. The best table saw featherboard guide explains how to choose one for your setup.
The Kreg True-FLEX Featherboard 2-Pack gives you two featherboards for larger workpieces or dual-pressure setups.
The featherboards use Wedge-Lock hardware for standard miter slots and T-slots. Their composite bodies apply consistent pressure to help keep stock straight during feeding.
Position a featherboard so it guides the work without preventing forward movement. It is not a substitute for proper blade height, a clear outfeed path, or safe hand placement.
How do you maintain dust collection and outfeed support?
Keep the dust path open and support long stock before it pulls against the blade or fence. Vacuum the port, hose connection, cabinet, and surrounding floor so sawdust does not collect around moving or electrical parts.
Look for crushed hoses, loose joints, and packed debris at the port. A clean connection improves capture, though the saw still needs hand cleaning.
Long boards need support beyond the table. A table saw roller stand can help support stock as it leaves the table if its height matches the saw surface and the roller does not push the board sideways.
Keep the outfeed path clear of clamps, cords, and offcuts. Support should guide the board without lifting it into the blade or changing contact with the fence.
What should you inspect before storing a table saw?
End each session with the blade area clean, the table dry, and the saw protected from moisture. Remove scraps from the cabinet and floor, then leave the machine without pressure on the fence or cord.
Wipe the table and exposed metal surfaces dry. Apply a thin rust-protection coat when the saw is stored in a damp shop, and buff away residue before the next project.
Lower or position the blade according to the saw's storage instructions. Keep the throat plate, guard, riving knife, and accessories together.
Cover the saw only after it is dry and cool. A cover that traps moisture can encourage rust, especially on cast iron.
What is the simplest table saw maintenance schedule?
Clean after every session, inspect before every cut, and perform alignment and deeper cleaning when the saw's behavior changes. This catches dust, movement, rust, and safety-part problems before they become larger setup issues.
Before cutting, inspect the blade, guard, riving knife, cord, fence, insert, and work area. After cutting, brush away dust and wipe the table.
At deeper-cleaning intervals, clear the cabinet and miter slots, inspect adjustment mechanisms, protect the table, and measure blade-to-slot and fence-to-slot alignment.
Pick the A-Line-It Basic Alignment Tool for a straightforward dial-indicator setup. Pick the Neoteck Digital Table Saw Alignment Gauge for digital readings and broader machine alignment.
Add the Kreg True-FLEX Featherboard 2-Pack when steadier stock control is the main need.
That is how to maintain a table saw: clean it often, measure alignment when needed, protect the table, and keep support and safety parts ready for the next cut.
Frequently asked questions
Should you lubricate table saw parts?
Lubricate moving adjustment points when they become stiff, using a product approved for your saw and applying only a small amount. Keep lubricant away from the belt, blade, work surface, and areas where it can attract sawdust.
How do you protect a table saw from rust?
Clean the cast-iron surface, dry it fully, and apply a thin coat of a suitable rust protector. Buff away excess so the table stays smooth and the finish does not transfer heavily to wood.
Why does a table saw need alignment?
Alignment keeps the blade, miter slot, fence, and table working in the same reference line. It helps reduce binding, uneven cuts, and unnecessary strain on the blade and motor during normal work.